Tracking and Controlling AWS Costs
Part 6 of the AWS Cloud Resume Challenge.
Before building the backend portion of my project—specifically the Lambda functions and DynamoDB tables—I wanted to make sure I had proper cost monitoring in place.
AWS provides a powerful platform, but with that flexibility comes responsibility. A misconfigured service, an unexpected spike in traffic, or a forgotten resource can quickly lead to charges that exceed the Free Tier. To avoid any surprises, I took time during this stage of the AWS Cloud Resume Challenge to set up proactive cost monitoring and alerts. This gives me a safety net as I begin experimenting with more dynamic AWS services.
Step 1: Enabling Billing Alerts
Before creating alarms, AWS must first allow billing metrics to be accessed by CloudWatch. By default, billing alerts are not enabled for new AWS accounts, so this needs to be turned on manually.
To enable them, I navigated to the Billing and Cost Management Console and opened Billing Preferences. From there, I enabled the option: Receive Billing Alerts.
Once enabled, AWS begins publishing billing data that CloudWatch can monitor. An important detail is that billing metrics are always stored in the US East (N. Virginia) region (us-east-1). Because of this, any CloudWatch alarms that monitor billing metrics must also be created in that same region.
Step 2: Creating a $1 “Early Warning” Alarm
The first alarm I created was a $1 billing alert. The purpose of this alarm is not to warn about spending a dollar, but to act as an early signal that something has moved beyond the Free Tier.
I created a CloudWatch alarm using the following settings:- Service: CloudWatch
- Metric: EstimatedCharges
- Currency: USD
- Threshold: $1.00
For notifications, I created an Amazon SNS (Simple Notification Service) topic that sends an email directly to my inbox whenever the alarm is triggered. This means if my account generates even a small charge, I will know immediately and can investigate the cause.
Step 3: Creating a $10 “Stop and Investigate” Alarm
The second alarm serves as a stronger safety measure. If my account reaches $10 in estimated charges, it likely indicates that something unexpected is running or scaling beyond what I intended.
To create this alert, I repeated the same CloudWatch alarm setup but adjusted the threshold:- Threshold: $10.00
- $1 alert: Early warning that spending has started
- $10 alert: Investigate immediately
Step 4: Setting Up Budget Threshold Notifications
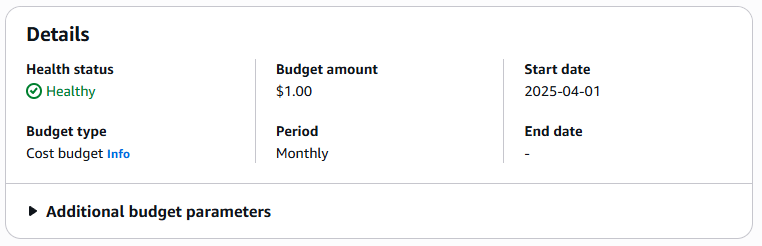
In addition to CloudWatch alarms, AWS also provides a service specifically designed for cost management called AWS Budgets. Within the AWS Budgets console, I created a monthly cost budget to track overall account spending.
I configured the budget to send a notification when usage reaches 80% of the budget threshold. This provides a proactive warning before the full limit is reached, giving me time to investigate or optimize resources. Budget alerts are sent via email, allowing me to stay informed about spending trends throughout the month.
Why Proactive Monitoring Matters
Setting up cost monitoring early is an important part of responsible cloud architecture. As I move into the backend development phase of this project, I will begin working with services like Lambda, DynamoDB, and API Gateway. While these services are serverless and highly scalable, incorrect configurations—such as infinite loops or unexpected traffic—can cause usage to increase rapidly.
With billing alarms and budget alerts in place, I can experiment and build with confidence knowing that any unusual spending will trigger an alert. This small amount of preparation helps prevent unpleasant surprises when the monthly bill arrives.
What's Next?
With cost monitoring in place and the frontend infrastructure fully automated, it's time to begin building the dynamic backend components of the website.
In the next post, I'll walk through how I created a serverless visitor counter using AWS Lambda and DynamoDB. This feature tracks how many people visit the site and displays the count directly on the homepage.
Next Up: Building the Backend - Creating the Visitor Counter with Lambda and DynamoDB