Securing the Website with CloudFront and HTTPS
Part 4 of the AWS Cloud Resume Challenge
Now that my domain was pointing to my S3 bucket through Route 53, the website was technically live. However, it was still being served over HTTP, which causes modern browsers to mark the site as Not Secure.
To fix this, I added Amazon CloudFront and AWS Certificate Manager (ACM) to enable HTTPS and improve performance by distributing the site through AWS's global edge network.
Amazon CloudFront is AWS's Content Delivery Network (CDN). It caches website content at edge locations around the world, allowing users to retrieve files from the location geographically closest to them. This reduces latency and significantly improves load times.
Step 1: Requesting an SSL Certificate
Before configuring CloudFront, I needed an SSL/TLS certificate for my domain. I used AWS Certificate Manager (ACM) to request a public certificate for:
jonathanlayman.comwww.jonathanlayman.com
To validate ownership of the domain, I selected DNS validation. Because my domain is managed in Route 53, ACM automatically created the required validation records when I clicked Create records in Route 53. Once the DNS records propagated, the certificate status changed to Issued, meaning it was ready to attach to CloudFront.
Important note: CloudFront only supports certificates created in the US East (N. Virginia) region (us-east-1). Even if other resources are located elsewhere, the certificate must exist in this region for CloudFront to use it.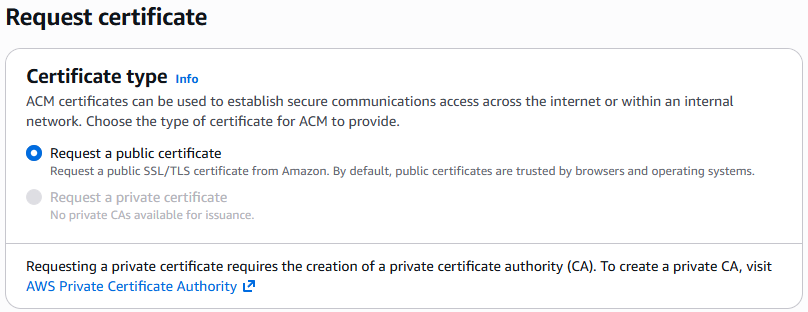
Step 2: Creating the CloudFront Distribution
With the certificate ready, I created a new CloudFront distribution. Key settings included:- Origin Domain: My S3 bucket (using the standard S3 endpoint)
- Viewer Protocol Policy: Redirect HTTP to HTTPS
- Default Root Object: index.html
- Price Class: Use all edge locations
- Alternate Domain Names (CNAMEs):
jonathanlayman.com,www.jonathanlayman.com - Custom SSL Certificate: The ACM certificate created in Step 1
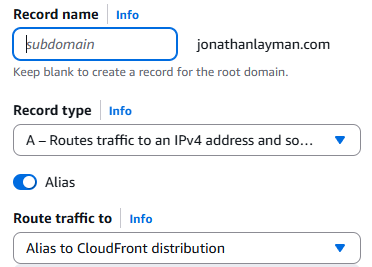
Step 3: Updating Route 53 to Point to CloudFront
Initially, Route 53 was pointing directly to the S3 bucket. Now that CloudFront is sitting in front of the bucket, I had to update my DNS records to point to the CloudFront URL instead.- Action: I went back to my Hosted Zone in Route 53 and edited the "A Record" I created in the previous post.
- New Target: I changed "Route traffic to" from the S3 bucket to Alias to CloudFront distribution and selected my new distribution from the list.
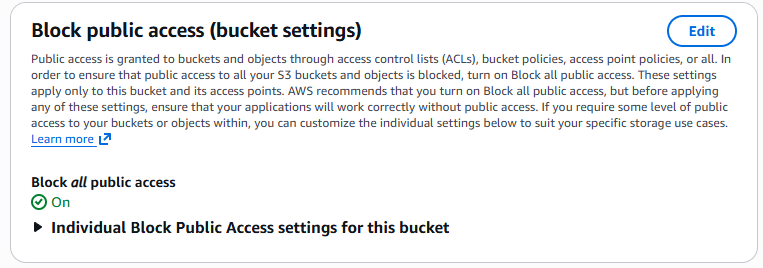
Step 4: Restricting S3 Access (Optional but Recommended)
To prevent users from bypassing CloudFront and accessing the S3 bucket directly, I configured Origin Access Control (OAC). OAC allows CloudFront to securely request objects from the bucket while keeping the bucket itself private. I updated the S3 bucket policy to allow access only from the CloudFront distribution, which ensures that all traffic flows through CloudFront where HTTPS and caching are enforced. This improves both security and performance.The Result
After waiting for the CloudFront distribution to deploy (typically 5-10 minutes), the site became fully operational behind the CDN. The final result:- The site loads through HTTPS
- Traffic is distributed globally through CloudFront edge locations
- The S3 bucket is no longer publicly accessible
- All traffic flows through CloudFront for caching and security
At this point, the static website was fully hosted, secured, and optimized for global delivery.
What's Next?
Now that the frontend infrastructure is fully deployed and secured, the next step is automation. Manually uploading files to S3 works, but it does not scale well for real development workflows.
In the next post, I'll configure GitHub Actions to build a CI/CD pipeline that automatically deploys updates to the site whenever I push new code to my repository.
Next Up: Automating with GitHub Actions and CI/CD